How to Change a Mobile Screen Protector at Home?

Changing a mobile screen protector at home can seem daunting, but with the right tools and a bit of patience, it’s a straightforward process. Here’s a comprehensive guide to help you replace your screen protector with ease.
Materials Needed:
- New screen protector
- Cleaning wipes (alcohol-based and dry)
- Dust removal stickers or tape
- Microfiber cloth
- Card or squeegee (usually included with the screen protector)
- Optional: a small spray bottle with water (for wet application protectors)
Step-by-Step Instructions:
- Prepare Your Workspace
- Find a clean, dust-free environment. A bathroom after a hot shower can be ideal as the steam helps settle dust particles.
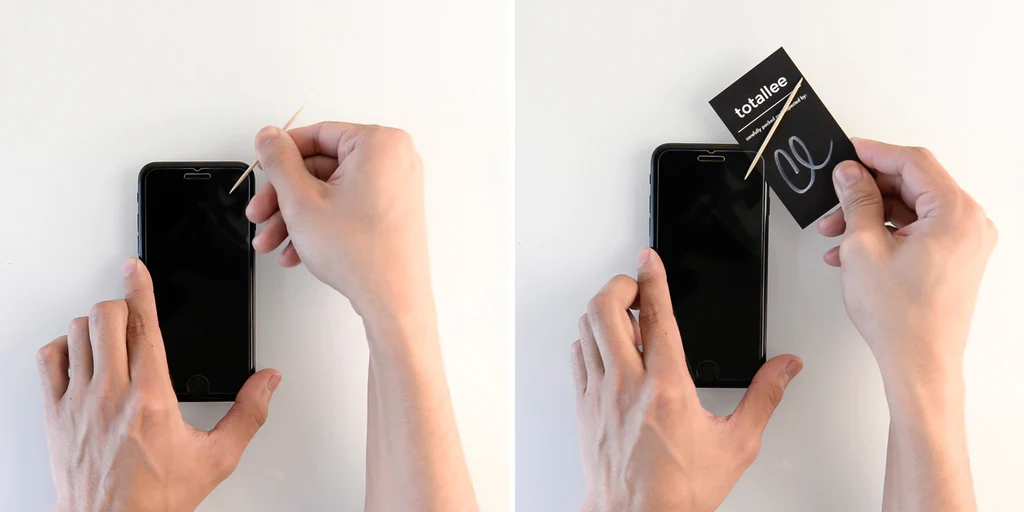
- Remove the Old Screen Protector
- Start at one corner of the screen protector. Use your fingernail or a thin, flat tool to gently lift the edge.
- Slowly peel off the old protector. Be careful not to snap it off, as this can cause shards (especially with glass protectors).
- Clean the Screen
- Use the alcohol-based cleaning wipe to thoroughly clean your phone’s screen. This removes oils and residue.
- Follow with the dry cleaning wipe to remove any remaining moisture.
- Use a dust removal sticker or a piece of tape to dab the screen and lift any remaining dust particles.
- Align the New Screen Protector
- Carefully remove the backing from the new screen protector. Avoid touching the adhesive side.
- Hold the screen protector by the edges and align it with your phone’s screen. Take your time to ensure it’s perfectly aligned with the edges and any cutouts (e.g., for the camera or home button).
- Apply the Screen Protector
- For dry application protectors, gently lay the screen protector onto the screen, starting at one edge and slowly lowering it into place. Use a card or squeegee to push out any bubbles from the center outward.
- For wet application protectors, lightly spray the adhesive side with water. This allows you to reposition the protector if necessary. Align and lay the protector on the screen, then use a squeegee to remove excess water and bubbles.
- Smooth Out Air Bubbles
- Use the card or squeegee to gently push out any remaining air bubbles. Work from the center towards the edges. If any small bubbles persist, they often disappear within 24-48 hours.
- Final Touches
- Once the screen protector is in place and all bubbles are smoothed out, use a microfiber cloth to give the screen a final polish.
Tips and Tricks:
- Patience is key: Take your time during alignment to avoid redoing the process.
- Clean hands: Ensure your hands are clean to prevent transferring oils to the screen or protector.
- Edge alignment: Start aligning from one end (typically top or bottom) to ensure straight placement.
- Check for dust: Even a small speck of dust can cause bubbles. Use the dust removal stickers liberally.
Changing a mobile screen protector at home is a manageable task that saves money and ensures your device stays protected. By following these steps, you can achieve a bubble-free, perfectly aligned screen protector application.


